
| Home | Use your favorite 3D editor to create tracks, then import the pieces into TrackEd and drive your own track. |
|
|
|
With TrackEd you can import models, add timelines, grid positions etc. to bring together your track. First, make sure you've read about the concepts of the tracks in Racer. To import SCGT tracks, check out the tutorial. The keyboard and mouse shortcuts are down below.
HOW-TO
I've decided to help you learn TrackEd by question & answer. This takes a middle line between a low-level tutorial and a reference guide. Reference guides usually don't learn you the intended use, and tutorials are incomplete by definition. However, if you're unsure how to get something done in TrackEd, mail me so I can add your question to this document. TrackEd is one of the more important programs to be documented verbosely.
The Big Picture:
Basic track management:
Files involved
Skies and environment
Graphics
Physics
Importing tracks:
Track surfaces and timelines:
Optimizations
THE BIG PICTURE
I'm anxious and have little time! What is minimally required to get a track up?
You'll need to copy a track.ini file, modify its name, get some models in, add at least 2 timelines, a grid and pit position, and at least 1 track camera (or pressing C will not work). For really nice tracks, read on to the next question though...
What else do I have to do to get really great tracks?
After you've imported the raw models for your track, there's some extra work. You'll have to add track camera's all around the track. Also, you'll need to add correct properties to all the objects. By default, all objects have flags 'Collide' and 'Surface' turned on. For performance reasons, you want to turn off 'Collide' for all objects that are very unlikely (or unwanted) to be collision targets (like grandstands tucked neatly away in some spot where your car will never come). Also, you will want to turn off 'Surface' for all objects where you'll never drive (like trees).
After all this, splines should be defined, for drivability's sake, so that the track becomes smooth (try driving on an oval without splines and you'll see that the sudden changes at each polygon makes it impossible to drive fast).
Also, make sure you define correct surfaces for your track. This will enables grass to be slippery, and create appropriate sounds for each type of surface.
These things definitely cost more time than just a quick model import, but are needed to get good entertaining tracks.
BASIC TRACK MANAGEMENT
How do I select a track and load it?
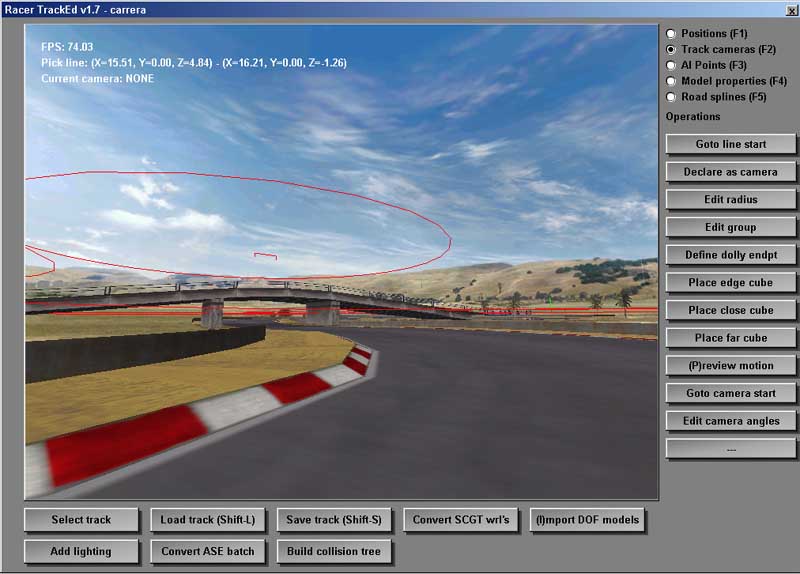
First, click 'Select track' and type the name of the track.
This is the directory from data/tracks where the track is located. For example,
'carrera' selects the default Carrera track.
Then select 'Load track' and the track will be loaded. Note (4-6-01) that loading
a track twice will double the number of models that are loaded. To avoid this,
quite TrackEd and restart. It's not a problem if you save a twicely loaded track
though; next loads will only load each model once.
How can I get models from my 3D Modeling Package into TrackEd?
There are several ways to do this. Supported are 3D Studio Max through ASE exports, there is a Maya exporter (see Stecki's site), and ZModeler can natively handle DOF files. On Linux, AC3D may well support DOF files by now. Recommended is to use the Cut Multi/sub ASE method; that's been used the most and is the easiest way.
Since exporting big track ASE files can be unhandy (and Modeler
can't handle these well), TrackEd v2.2+ has a 'Cut ASE' button. This requests
an (assumed big track) ASE file, and splits it apart into its objects in the<installdir>/output/
directory. After that, copy the files in <installdir>/output/
to your track directory in a subdirectory 'ase', i.e. c:\sims\racer\data\tracks\mytrack\ase.
Then in TrackEd, click on 'Batch ASE convert' and that will convert all the
.ase files in ase/ into DOF files, optimized and all (may take quite a while).
Lastly, import the generated DOF files by clicking 'Import DOF files' and type
'*' to import them all. Don't forget to save.
2 of these 'Cut ASE' functions exist; the 1st is based on tracks where no multi/sub materials are used (the ASE format is based on 3D Studio Max' output). Each object (GEOMOBJECT) for this ASE import is assumed to have just 1 material referenced (so basically just 1 texture). The 2nd ASE Cutter ('Cut Multi/sub ASE') is based on multi/sub Max ASE exports, which you may find are more targeted at tracks that were designed for EA/ISI's F1-2002. Here, the ASE file will probably just a few (if not 1) GEOMOBJECT, and multi/sub materials that in their 1st level just define a 'multisub' material, and in the level below that the materials themselves that are actually used by the polygons. This is useful for lofts for example; you can in Max define an ID for each segment in a line that is lofted, resulting in the loft object to have the right submaterial selected for the polygons. So for example if the first segment indicates grass, the next kerb, then road, kerb and grass again, you will have 5 material ID's (0..4). Lofting this line and assigning a multi/sub material with 5 submaterials should automatically assign the right submaterials to the lofted polygons.
Output files for the Multi/sub ASE cutter are in the form <submaterial>_<geomname>.ase (in output/). This makes it easier to later on distinguish surfaces based on material name.
The process for the preferred Multi/sub ASE method is as follows:
How do I add models to the track?
Click 'Import DOF files' and enter the pattern of the
.DOF files you wish to import. Click OK and the files will be inserted. Try
looking around and see if they're there. Enter '*' to load all models.
You can also batch-convert a bunch of .WRL models using 'Convert SCGT wrl's'.
This expects the models in <trackdir>/SCGT/wrl (the case is important
on non-Windows systems!). The last option is an ASE batch conversion, by clicking
'Convert ASE batch'. This expects the .ASE models (which can be exported using
3DS Max) in <trackdir>/ase/.
How do I remove models to the track?
Removing models is not yet possible from within TrackEd. You must manually remove the entires in data/tracks/<mytrack>/geometry.ini.
Adding movable objects to the track?
Next to the models described above, you can also (since Racer v0.5.3 beta 2.0) add movable (dynamic) objects to a track. In Tracked, select 'Movable objects' or press F7. Then select a location and click 'Add object'. To move an object, select the object to move with PageUp/PageDown, select a (new) location and click on 'Move object'.
How do I save what I've added/changed to the track?
Click 'Save track' and all of the track's attributes will be saved.
Why & how should I add splines to the track?
When just driving on the track polygons, things are never smooth enough. Racer can use full 3D spline patches to make tracks a lot smoother (indispensable for ovals for example). See this document for more detailed information.
FILES
This file contains the node names of the geometry in the track. Each entry references a DOF file and can specify extra details.
An example:
objects
{
  brid4u
  {
    file=brid4u.dof
    flags=6
  }
...
}
Normally the node name ('brid4u') is the same as the DOF file being referenced, although this is not a requirement.
The 'flags' field is a bitwise-or of the following available flags:
| Flag value | Name |
Description |
| 1 | F_SKY | This node is part of the sky; don't cull it in the view frustum |
| 2 | F_COLLIDE | May collide with this; a collision body is generated for cars to hit. |
| 4 | F_SURFACE | Is a hard surface (a road for example). From all surface objects, an AABB tree is generated for raycasting. |
| 8 | F_RELATIVE_POS | Moves with the car or camera (obsolete - do not use) |
| 16 | F_INVISIBLE |
Not renderered. Future flag (not yet implemented) |
| 32 | F_LIGHTMAP | Use lightmapping (vertex/texture) - not yet implemented. Tested at some point with a demo version of Adobe Beast but never used beyond that. |
| 128 | F_DECAL | Drawn on top (driving line, static skids). Obsolete - do not use anymore. |
| 256 | F_RECEIVE_SHADOW | Receives shadow (stencil shadowing) - do not use |
| 512 | F_RECEIVE_LIGHT | Affected by lights (projective texturing). Unused |
| 1024 | F_MOVABLE | Object is movable (has physics or is animated) |
| 2048 | F_HIDE_WHEN_DARK | Hide during darkness (not often used) - Racer v0.9.0RC9+. For example, a lit house that is dark at night might be hidden. The inverse, F_HIDE_WHEN_LIGHT, is much more usable. |
| 4096 | F_HIDE_WHEN_LIGHT | Hide during the day / light. This can be useful for light models, i.e. lanterns throwing light onto the road. When it gets light, these objects are turned off automatically. |
This file contains contextual information, such as surface definitions (grip...), atmosphere settings, grid positions, pit positions, track camera positions, triggerlines, timelines, track audio definitions, traffic waypoints.
This file contains the line definitions that make up the drivable road surface. This is used to smooth out the surface (driving on the graphical triangles is too harsh). Note that special.ini contains surface definitions which can add synthetic noise again, to make the surface less smooth.
This file contains basic information on the track, such as the verbose name, length in meters, creator and such.
SKIES
Import a sky model. It will probably not render correctly yet; you'll need to turn the objects' flags 'Sky' (1) on (in geometry.ini, set the model's flags to 1). These days, you also need a shader for all the sky materials and set 'sky=1' in the shader as well. Then use the sky_v.cg/sky_f.cg shaders; these makes the render engine stick the Z coordinates to the far plane, so it's *just* rendered but behind everything else.. You still need the geometry.ini sky flag (1) since that turns off culling for the object (otherwise they will be culled according to the view frustum). Some skies are a full dome and wouldn't be culled (since the car is always somewhere in its bounding box) so using flags=0 wouldn't hurt. Panorama objects in front of the skydome should use the panorama_v/f Cg shaders.
GPL (Grand Prix Legends) sky models (called horiz.3do sometimes) are big models which can be inserted so that it encapsulated the entire track (they have the advantage that you can add a cloud here & there which more realistically moves when you drive along the track; try Silverstone in GPL for example).
Lastly, at http://www.1000skies.com/fullpanos/index.htm you can find some beautiful sky textures to use for your models (a semisphere for example).
How do I change the sky color from black to something else?
The Cg version automatically generates atmosphere colors. Make sure your sky texture only adds clouds through its alpha channel; don't let the blue parts of the sky mix with Racer's generated atmosphere colors (it would mix your image blue and Racer's atmosphere, probably giving funny results).
Fog is superseeded by atmospheric calculations in the GPU shaders. See this tutorial for more information.
You can add a sun to your track for special effects. The sun will brighten the screen if the camera looks at it, and flare effects appear. In the track's special.ini file, add these parameters:
If you don't specify the gfx.sun line, no sun or flare effects will be used (for dark or cloudy tracks). The default is to have no sun.
How do I add track-specifc environment maps?
Each track can have its own environment maps. Normally, default ones are in data/images/track*.tga and sun*.tga. If you place overriding files in the track directory, these will be loaded instead of the default ones. Notice this is all-or-nothing for each environment map type. So if you supply track_dn.tga, you must also supply the other 5 maps (_lt, _rt, _up, _fw and _bw).
Adding rain is on a seperate page about tuning and adding rain.
GRAPHICS
At load time, an attempt is made to load a <trackdir>/track.shd file. This file contains shader definitions for the track materials to come. Any materials not overruled just use their basic material texture as specified in the DOF file. Check out the shader reference for more information on shaders.
Tracked v4.6+ has a button called 'Make track_template.shd' which creates a track_template.shd file in the track directory with all materials in the currently loaded track. You can use this file as a basis for your shaders. Note the existence of 2 types of shaders; Racer shaders (describing which textures are used and how) and GPU shaders (Cg shaders currently which are used to modify vertices/fragments; those are much more low-level). The shaders in track.shd are Racer shader, but can reference GPU shaders through their vertex_shader and fragment_shader trees.
Do you have any tips on the track creation process?
There are some general guidelines to making nice tracks.
PHYSICS
The latest Racer versions use the Newton physics engine. When loading a track for the first time, an optimized collision mesh is generated and stored in data/tracks/<trackName>/cache/trackcollision.bin. You don't need to supply this file when distributing the track, although it may save a bit of time for the users of the track. As an example, the Speedest2 track creates a 4,5Mb file, so you may or may not want to include this in the distribution.
When modifying the track geometry, be sure to remove the .bin file though, so that it is regenerated the next time you load the track.
IMPORTING TRACKS
I have an SCGT track, how do I import it?
Check out the tutorial, which explains most of it. After a while you'll end up with .WRL files in data/tracks/<mytrack>/SCGT/wrl. Then, click 'Convert SCGT wrl's', which will convert all .wrl files to .DOF files (including optimizing and the lot). After this is done, you can import the .DOF files as in a normal Racer track.
My imported track can't be loaded, what might be the problem?
Make sure you have a track.ini file which has the right name (so it will show up in Config, for example). If you can select the track but it fails to load, you might have forgotten to include at least 2 timelines. This is needed to avoid (too much) cheating. Also, make sure you have at least 1 track camera, and ofcourse a grid and a pit position for the car to start at. Check the QLOG.txt file for possible other hints.
TRACK SURFACES
How do I define surface types?
Check the track surface document for detailed information on track surfaces.
Just draw a line, from the left side of the road (as seen from the car while driving in the right direction) to the right side of the road; then click 'Declare timeline'. Note that v0.5.2 supports named timelines; you must edit those directly in the track's special.ini file. Set timeline.line<n>.name to the desired name (for example 'Senna curve'). This name will then be used instead of a more generic name like 'Start/finish' or 'Intermediate 2'.
Note that the first spline line is always used as timeline0. This is related to the fact that the lap distance is calculated on the spline, and you want the start/finish timeline aligned perfectly with the spline entry. Otherwise when crossing start/finish, your lap time would be off by just a little bit.
Racer v0.9.0RC9+ supports an extra settings in a track's special.ini: timeline.start_width. It defaults to 5.0, which means the timeline at S/F will be 5 times as wide as the spline entry. Setting it for example to 1.0, means it has the exact width as the initial spline line. This can be useful for some tracks which have U turns near the start/finish area. The timeline could trigger too quickly. In that case, use a small start_width value to avoid the timeline being too 'wide'.
See the tutorial on movable objects for more information.
OPTIMIZATIONS
Splitting tracks for improved performance
Use v0.5.3 beta 2.1+'s Tracked (splitter then works with Carlswood for example). So what does splitting do? It cuts a track into a bunch of separate models, based on material and locality. It overlay the track with a grid and chops it up. This has the advantage that rendered geometry is close to the car. Use a gridsize of around 300m (you may want to experiment with that). Larger values actually may work better; relate it a bit to the view distance.
Quick manual on Splitting:
| Key | Meaning |
| F1 | select position mode (grid/pit positions) |
| F2 | select track camera mode |
| F3 | select AI mode |
| F4 | select model properties mode. This colorizes the objects, depending on the flags set for a model. Red=collidable, green=surface, yellow=collidable+surface (v0.8.37+). |
| F5 | select road spline mode |
| C | Switch camera mode; DRAG, FLY or SPLINE (v4.2+) |
| M | switch to next mode |
| Shift-L | Load track |
| Shift-S | Save track |
| Left/Right | Move left/right (X) |
| Up/down | Move forward/back (Z) |
| Shift-Up, Shift-Down | Move up/down (Y) |
| G | Goto first selection point |
| P |
Preview trackcamera motion |
| Shift-Q | Quit program |
| F9 | Walk through stencil shadow modes (off/outlines/visible/on etc) (debugging) |
| Shift-Left/Right | Move through keyframes (in keyframed camera mode) |
| Shift-ENTER | Set keyframe |
| Home | Goto keyframe (moves the camera to display how that keyframe looks) |
| Keypad 7 | Roll left |
| Keypad 9 | Roll right |
| Keypad 8 | Reset roll to 0 degrees |
| Keypad - | Increase FOV |
| Keypad + | Decrease FOV |
| Ctrl-V | Toggle displaying of statistics (v4.1+) |
In Spline mode the follow keys are in effect:
| Key | Meaning |
| A | Add spline segment (automatically tries to find the next spline line; most effective when only road objects are loaded) |
| R | Remove last spline segment |
| Shift-< | Moves splines backward |
| Shift-> | Moves splines forward |
| Ctrl-< | Moves splines backward 10x |
| Ctrl-> | Moves splines forward 10x |
| [ | Select previous spline |
| ] | Select next spline |
| Shift-[ | Unselect last selected spline (v0.8.26+) |
| Shift-] | Add next spline to selection |
| Mouse function | Meaning |
| Left mouse button | Drag around in the X/Y plane (flat); use Ctrl for fast moves |
| Left mouse button+Shift | Pick & select; enables you to draw lines (for timelines, grid positions etc) |
| Right mouse button | Look around (rotations) |
| Left+right buttons | Move vertically |
| Mode | Button | Notes |
| Splines | Roll splines forward | Default=1 spline, use Shift for 10 splines, Ctrl for 50 splines |
| Splines | Roll splines backward | Default=1 spline, use Shift for 10 splines, Ctrl for 50 splines |
Object mode
This alternative way of moving around in TrackEd’s 3D space is very useful when editing movables for example.
Press ‘O’ or click on the checkbox in the bottomleft corner. Now you can navigate around a virtual point in 3D space. Press the ‘E’ button to do a ‘zoom extents’ on a object. You can zoom use the scrollwheel to zoom. Move around by using the default combinations of buttons used in default navigation mode. Hold the 'Control' button for smaller movements.
Known Caveats
These are things that are good to know:
(last updated December 30, 2014 )